How to Create a Restaurant or Shop Menu on SmartQRShop
Learn how to set up your restaurant or shop and create a digital menu using SmartQRShop in just a few steps.
Established
Worldwide
Rating
How to Create a Restaurant or Shop Menu on SmartQRShop
In the modern restaurant and retail world, having a digital menu is not just a luxury—it's a necessity. SmartQRShop is designed to help restaurant owners, shopkeepers, and service providers easily create and manage their menus online. Whether you own a single restaurant or run multiple outlets, SmartQRShop offers a fast, simple, and user-friendly solution.
In this guide, we’ll walk you through each step to set up your restaurant or shop and create your digital menu on SmartQRShop.
🚀 Step 1: Start at the Home Page
Visit the homepage of SmartQRShop.
Here you’ll see a clean layout and a prominent “Get Started” button.
Click the Get Started button to begin your journey.
🔐 Step 2: Sign Up or Login
Once you click "Get Started", you'll be redirected to the login page.
You can log in using:
Google for quick and secure access, or
Email & Password by signing up manually.
If this is your first time, simply sign up and complete your registration.
🏪 Step 3: Add Your Restaurant or Shop
After logging in, you’ll land on your dashboard. The first step is to create your restaurant or shop profile.
Click on “Restaurant” from the menu.
Click the “Create” button.
Fill in the required fields:
Name (e.g., Vikram Test Name)
Location (e.g., Jaipur, Rajasthan)
Hit the Create button.
✅ Your restaurant/shop profile is now saved.
💡 Note: You can skip this and still go ahead to create menu items if you're in a hurry, but it's recommended to add this first for better organization.
🍽️ Step 4: Add Categories (e.g., Breakfast, Lunch)
Menus are easier to manage when they are divided into categories.
To create a category:
Click on “Category” in the dashboard.
Click the Create button.
Add the Category Name (like “Breakfast”, “Lunch”, “Snacks”, “Drinks”, etc.)
Select the restaurant you created earlier from the dropdown list.
Click Create.
🎯 Pro Tip: Be clear and consistent with your category names. It helps customers easily navigate your menu.
📋 Step 5: Add Menu Items
Now you’re ready to start adding dishes, products, or services.
Go to the “Menu” section.
Click the Create button.
Enter:
Name (e.g., Poha)
Price (e.g., ₹120)
Select Restaurant from the dropdown
Select Category (e.g., Breakfast)
Optionally, upload an image of the menu item.
Click Create.
That's it! Your menu item is now live.
📲 Bonus: Mobile-Friendly & QR Ready
Every menu created with SmartQRShop is optimized for:
Mobile viewing
QR Code generation
Touchless access for your customers
This makes it perfect for restaurants, cafes, food stalls, cloud kitchens, and retail shops that want to offer a safe and modern experience.
✅ Why Use SmartQRShop?
Here’s what makes SmartQRShop a great choice:
No technical skills required.
Fully online – no need to install anything.
Clean and minimal design.
Menus categorized by type (Breakfast, Lunch, etc.).
Works for both restaurants and small shops.
Easy updates—change menu items anytime.
💡 Final Tips
Use real images of your items to attract more attention.
Keep prices updated to avoid confusion.
Organize items by meal type, time, or popularity.
Promote your QR menu by placing the code on your tables, packaging, or website.
Ready to Build Your Digital Menu?
Head to SmartQRShop.com and start creating your own modern, digital menu today.
Whether you’re just starting or want to upgrade your business, SmartQRShop gives you all the tools to go touchless and digital with ease.
.png)
Recent Blogs

व्हाट्सएप हैक: कारण, तुरंत समाधान और सुरक्षा — स्टेप-बाय-स्टेप गाइड
यह पोस्ट बताएगी कि WhatsApp हैक के सामान्य कारण क्या हैं, कैसे तुरंत अकाउंट रिकवर करें, चैट में ऑटो-मीडिया डाउनलोड को बं...
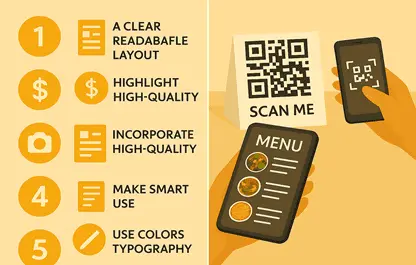
Top 5 Design Tips for Creating an Attractive Restaurant Menu
Learn the top 5 practical and proven design strategies to make your restaurant menu more engaging, on-brand, and convers...
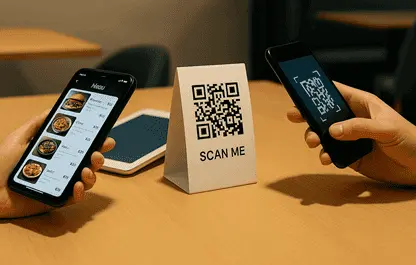
How a QR Code Menu Works: A Simple Guide
QR code menus are transforming how restaurants serve customers. This guide walks you through how they work—from scanning...